Next: 2.2 Running Ccaffeine Using Up: 2.1 Using the GUI Previous: Other Ways to Launch Contents
For the purposes of this exercise, we will assume that you are working in and environment in which GUI host and Ccaffeine host are separate machines. If they are the same, you can use $TUTORIAL_SRC/utils/run-gui.sh as described in Section 2.1.1 instead of the first two steps, below.
In the Ccaffeine host terminal window, you will see something like:
my rank: -1, my pid: 9625
Type: Server
Run simple-gui.sh --port port_num --host backend_host (on Windows, simple-gui.bat) on the GUI host .
Once the GUI connects to Ccaffeine , Ccaffeine begins running the rc file it was invoked with. In the GUI host terminal window, you first see some startup messages from the GUI itself, followed by a series of messages as Ccaffeine processes the rc file and the GUI displays the results. These are debugging messages and can largely be ignored.
In the Ccaffeine host terminal, you should see some additional messages as Ccaffeine processes the rc file, like:
CCAFFEINE configured with spec (0.8.2) and babel (1.0.4).

CCAFFEINE configured with classic (0.5.7).

CCAFFEINE configured without neo and neo components.
CmdLineClient parsing ...

CmdContextCCA::initRC: Found components/tests/test_gui_rc.
# There are allegedly 11 classes in the component path
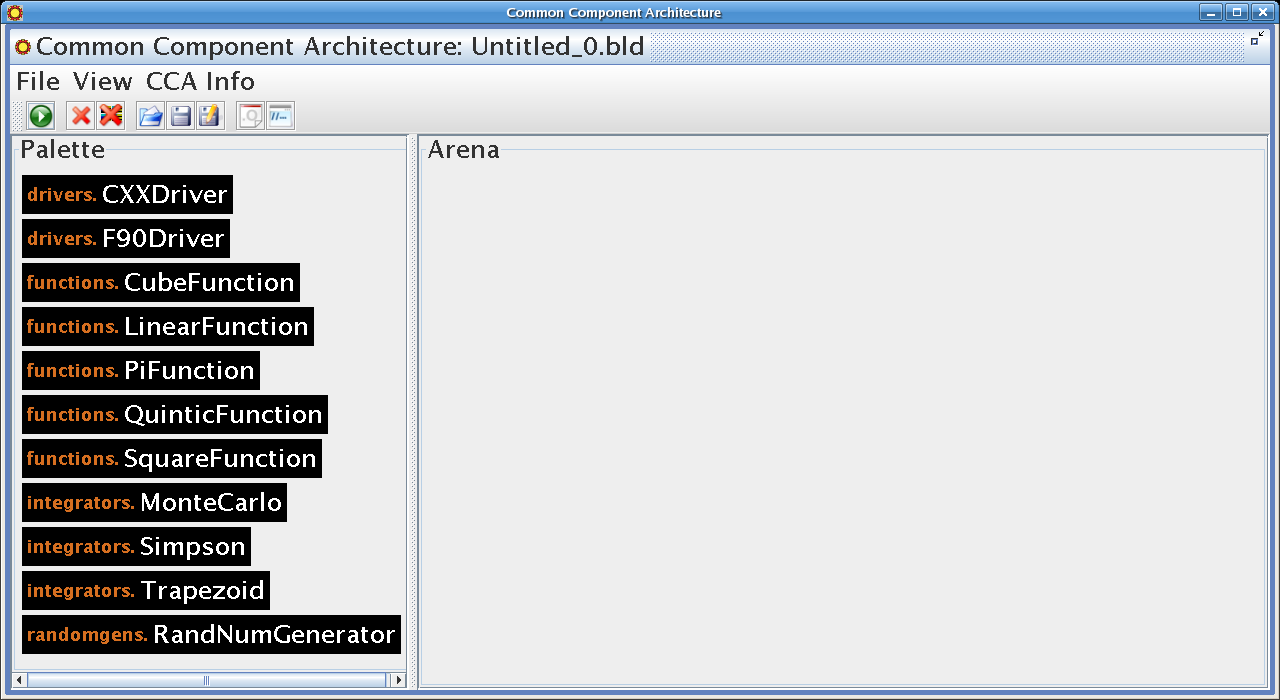
Finally, in the GUI host window, you should see some output associated with the GUI's initialization process, and the GUI itself should have appeared on your display, looking something Figure 2.1.
| Tip The default layout has the palette area fairly narrow. You can click-and-drag on the bar separating the palette and the arena to adjust the width. |
| Note You may see additional components in your palette , as we try to expand the variety of examples we provide in the tutorial-src . |
As mentioned above, the test_gui_rc sets up the path and loads the framework's palette with a set of available components. rc files are explained in detail in Section 2.2.
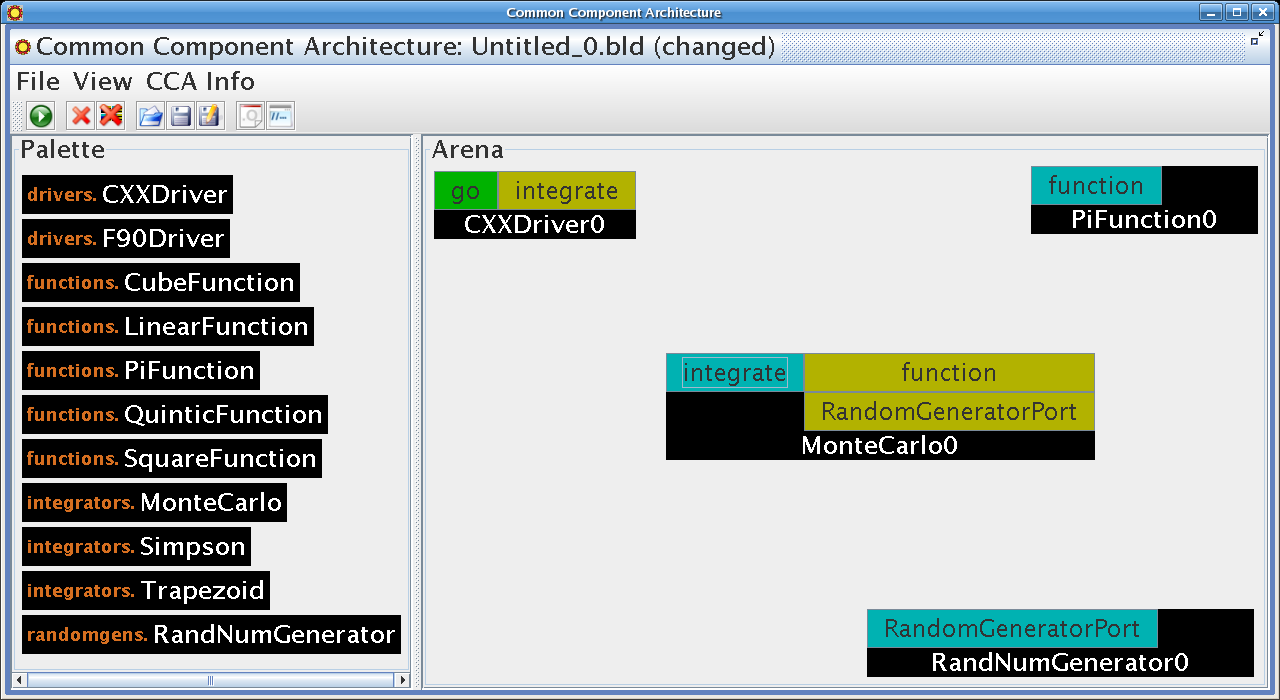
| Tip You can drag components around the arena to arrange them as suits you - just click on the black area of the component and drag it to the new location. The positions have no bearing on the operation of the GUI or your application. |
| Tip If you hover the cursor over a particular port on a component, a ``tool tip'' box will pop up with the port's name and type based on the arguments to the addProvidesPort or registerUsesPort calls in the component's setServices method. This can be useful for double checking to make sure you're connecting matching ports. Also notice that when you hover over a particular port (either uses or provides ), matching ports of the opposite type (either provides or uses ) will be highlighted. |
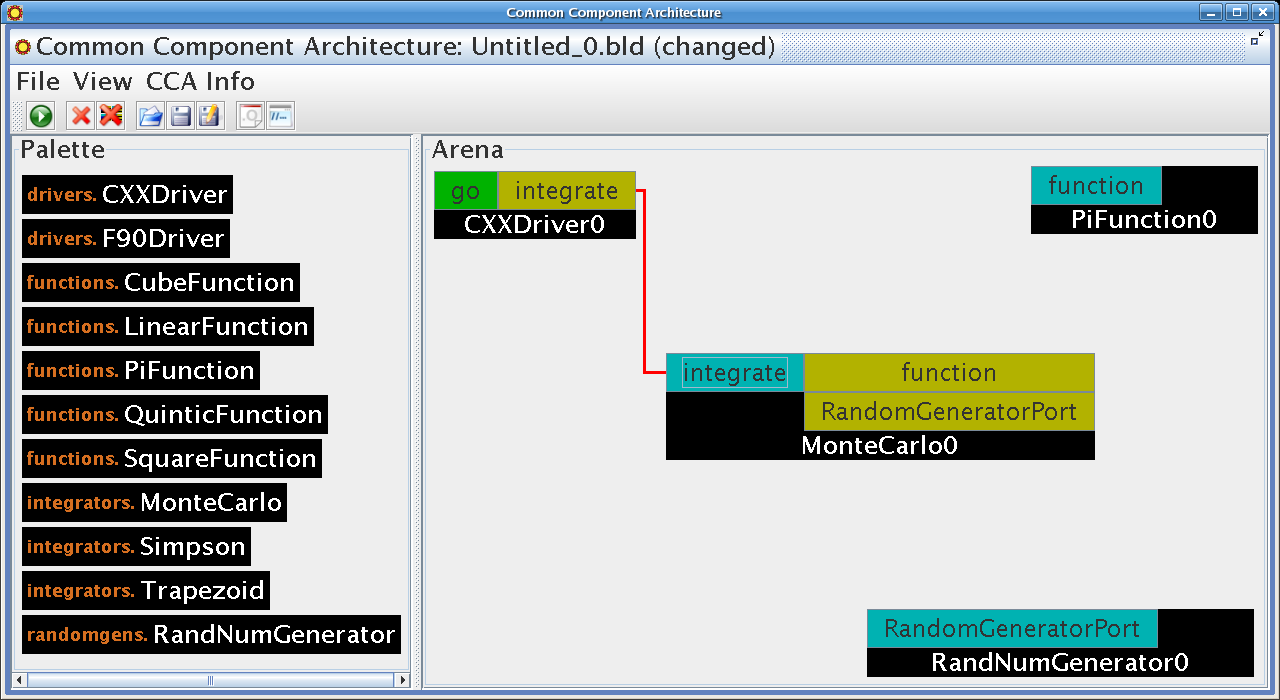
| Note You can move components around even after their ports are connected - the connections will automatically rearrange. There is no harm in connections crossing each other, nor in connections passing behind other components (though of course they may make it harder to interpret the ``wiring diagram'' correctly). |
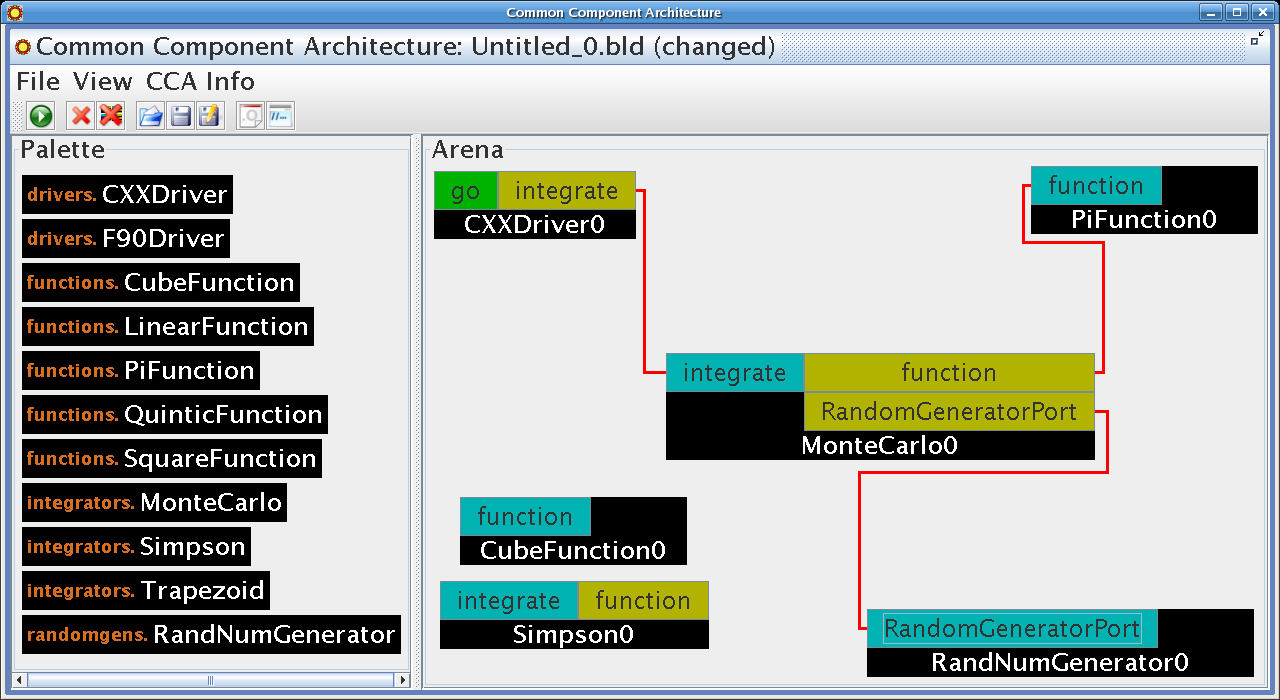
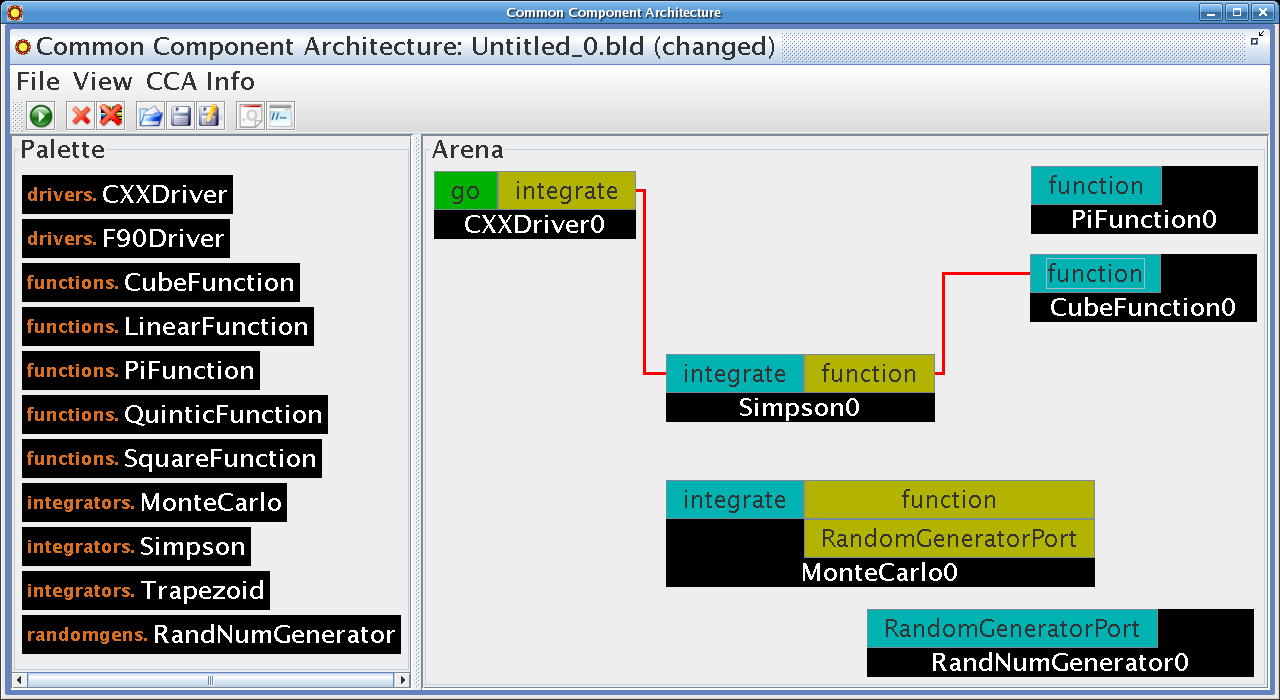
At this point, your GUI should look something like Figure 2.4.
The application is now fully assembled and is ready to run. If you
click-and-release the go button on the CXXDriver0
component, you should see the result appear in the Ccaffeine host
terminal, ``Value = 3.139160''2.2 and the
message
``IN: ##specific go command successful''
in the GUI host terminal.
| Tip Remember that your application is running within the framework. Unless the application itself does something special, the output from the application will appear in the window in which the framework is running. |
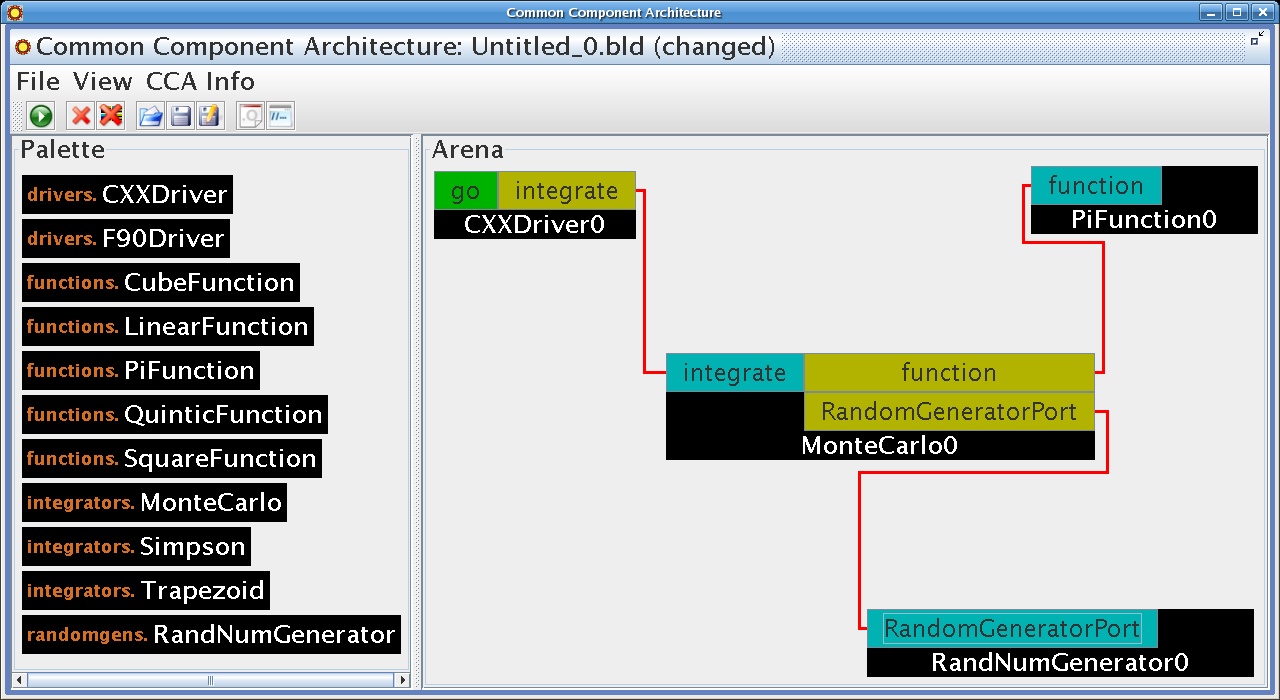
| Tip As we've mentioned, wiring diagrams can become hard to interpret when they become cluttered, as is the case with the screen shot above. To help interpret the diagram, remember the following:
|
There is no need to remove unused components from the arena - as long as they are not connected to active components, they will not interfere.2.4 In fact in this case, neither MonteCarlo0 nor RandNumGenerator0 are used, so it is safe to leave them connected to each other.
| Note Steps 8 and 9 could have been done in either order. |
Click-and-release the go button on the CXXDriver0 component,
you should see the result appear in the Ccaffeine host terminal,
``Value = 3.141593'' and the message
``IN: ##specific go command successful'' in the GUI host
terminal.
Value = 0.250000''2.5 in the Ccaffeine host
terminal.
| Note Observe that as a user of CCA components, you have no idea what language each component is implemented in. (Admittedly, the names of the drivers are suggestive of the implementation language, but those names were chosen at the convenience of the component developer, and they provide no guarantees regarding the components' implementations.) The language interoperability features of Babel allow components to be hooked together regardless of implementation language with complete transparency. |
| Tip If you've used the GUI to setup and start a long-running simulation, and you don't want to leave the GUI running continuously, you can use the File |
| Tip If the backend crashes while the GUI is running, exit the GUI by using Detach. Trying to Quit without a running backend will cause the GUI to hang. |
David E. Bernholdt [bek] 574-3147 2009-08-21